Everytime when I use Windows, The biggest thing I missed is ZSH with Oh My Zsh. I tried to use PowerShell or CMD, but it’s not as good as ZSH.
So I decided to make it better and feel like I’m using ZSH.
What do I need from a terminal?
These are all the capabilities I need from a terminal:
- Jazzy colors
- Integration like git, nvm, etc
- Familiarity with ZSH
- Autocompletion for commands and files
- sudo command
Let’s get started
Chocolatey (optional)
Chocolatey is a package manager for Windows. Like Homebrew for macOS or apt for Debian based distros.
This is optional but it will help installing software from terminal easily. You can follow their documentation to install it.
PowerShell 7
First, we need to install PowerShell 7. I’m going to download it from their website. Or you can install it using Chocolatey.
choco install powershell-coreWe don’t use Windows PowerShell (The pre-installed one) because it doesn’t support some features we need.
For who confused what’s difference between Windows PowerShell and PowerShell Core 7, you can check out this YouTube video.
Nerd Fonts
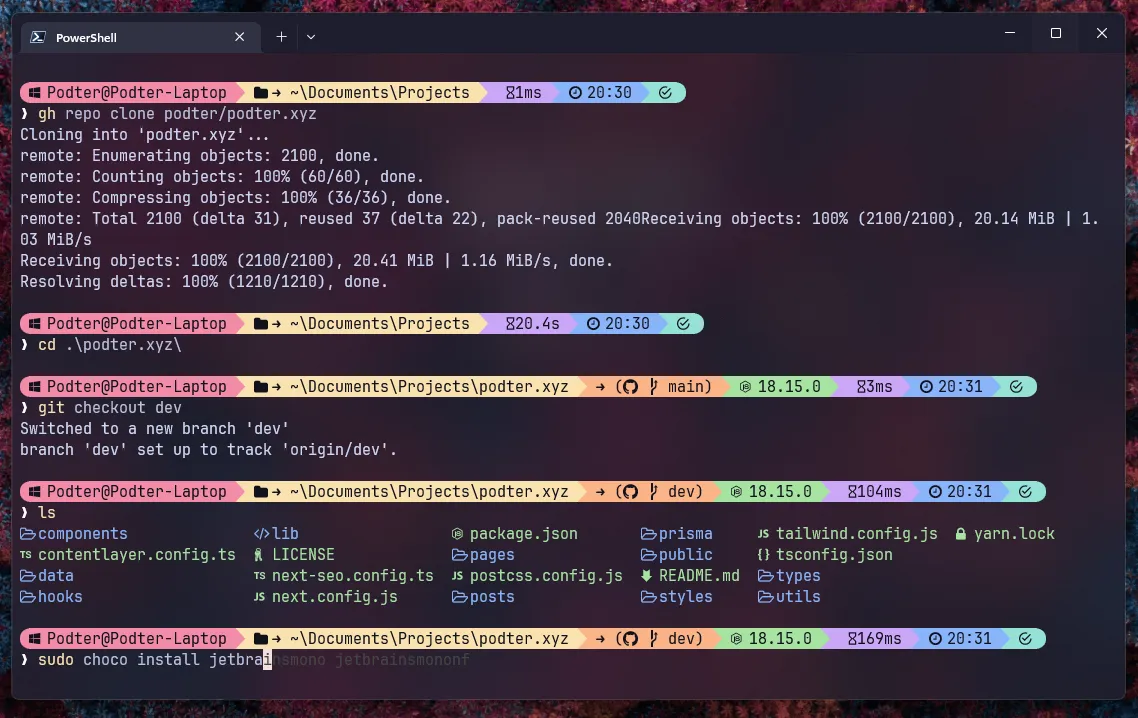
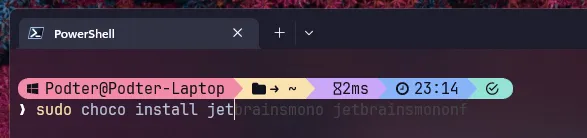
Nerd Fonts is a font that supports icons. We need this font to make our terminal look better. Choose your favorite font from their website. I choose JetBrainsMono Nerd Font and I’m going to install it using Chocolatey.
choco install jetbrainsmononfWindows Terminal
Windows Terminal is a terminal emulator for Windows. I’m going to install from Microsoft Store. But you can also install it using Chocolatey.
choco install microsoft-windows-terminalOpen Windows terminal and then set default profile to PowerShell 7:
- Settings (That down arrow in the top bar)
- Set Default Profile as “PowerShell” (the black icon, not the blue Windows PowerShell one)
Also don’t forget to set the fonts:
- Settings
- Profiles (left menu)
- PowerShell (or Defaults if you want to change globally)
- Appearance
- Font face
- Select the installed Nerd font, I choose
JetBrainsMono NF
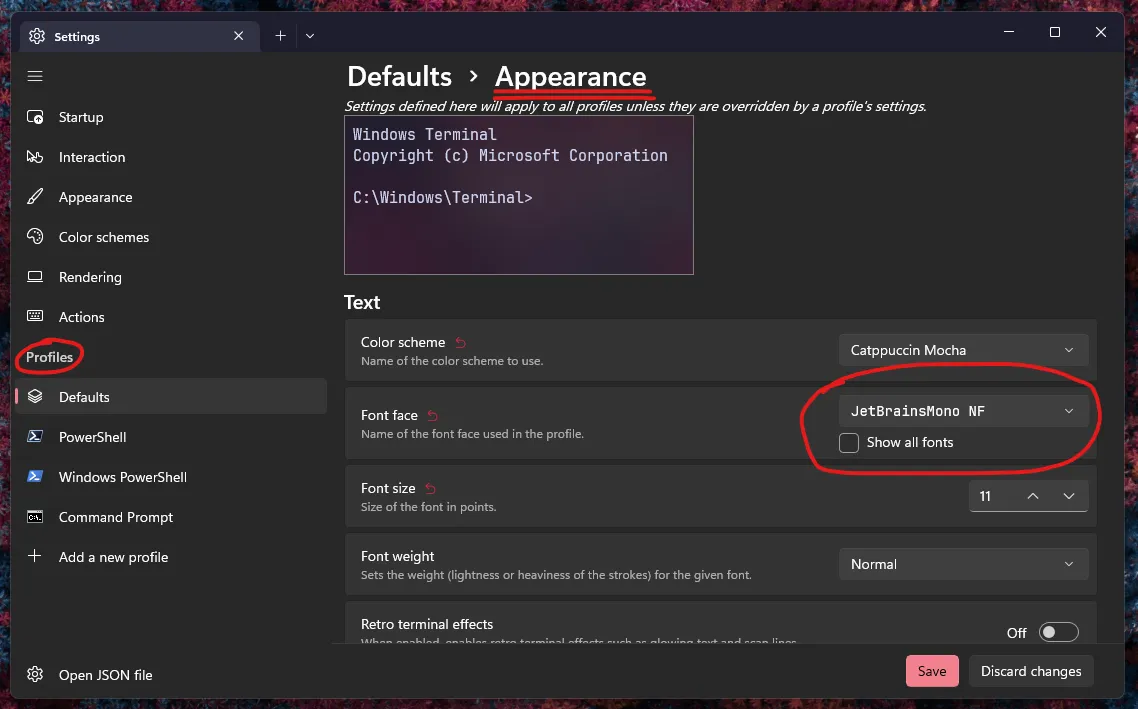
You can change the color scheme too.
Oh My Posh
Oh My Posh is a theme engine for PowerShell. It’s like Oh My Zsh for ZSH. You can follow their installation guide to install it. But I’m going install it using Chocolatey.
choco install oh-my-poshAfter installing, we need to create PowerShell profile. The PowerShell profile is same as .zshrc or .bashrc. You can provide initial commands, aliases, etc.
You can create it by running this command:
New-Item -Path $PROFILE -ItemType File -ForceThe file should be located at this following path:
~\Documents\PowerShell\Microsoft.PowerShell_profile.ps1Open the profile using your text editor.
# Open in VS Code
code $PROFILE

# Or open in Notepad
notepad $PROFILE
And set Oh My Posh as the default shell. Put this inside the profile file so that every time you open the terminal, it loads Oh My Posh.
oh-my-posh init pwsh | Invoke-ExpressionTo set custom theme, you need to change the --config option of the oh-my-posh init command. For example:
# Load amro theme
oh-my-posh init --config amro pwsh | Invoke-Expression

# Load from file
oh-my-posh init pwsh --config 'C:/Users/Someone/jandedobbeleer.omp.json' | Invoke-Expression

# Load from URL
oh-my-posh init pwsh --config 'https://raw.githubusercontent.com/JanDeDobbeleer/oh-my-posh/main/themes/jandedobbeleer.omp.json' | Invoke-Expression
You can find more themes on theme documentation. Or learn more about customizing Oh My Posh on customize documentation.
You can download my modified version of montys theme from this gist. Or import from URL directly:
oh-my-posh init pwsh --config 'https://gist.github.com/Podter/59f8874dcec39b706fd46ad1049daf2f/raw/7cfe4e98eb81ecf80519f8de0a9ae4c1f9483025/montys.omp.json' | Invoke-Expressionlsd
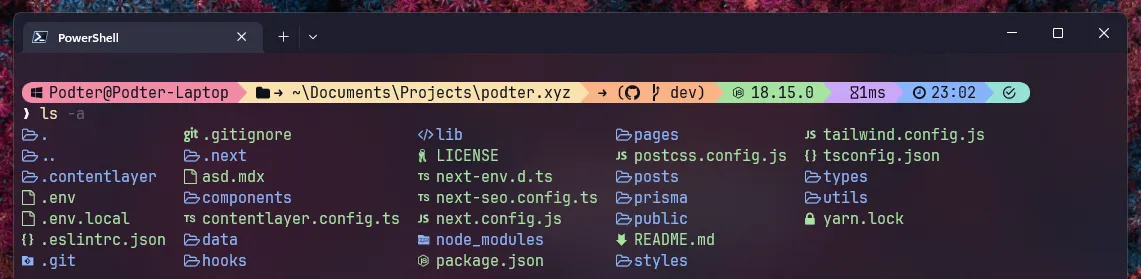
lsd is a ls command with colors and icons. You can follow the installation guide on their GitHub readme. I’m going to compile manually but you can install it using Chocolatey.
choco install lsdAnd then replace the PowerShell’s default ls command with lsd:
Set-Alias ls lsdYou can also add some aliases for ls command:
function l { lsd -l $args }
function la { lsd -a $args }
function lla { lsd -la $args }
function lt { lsd --tree $args }
These will add l, la, lla, and lt aliases for ls command.
gsudo
gsudo is a sudo command for Windows. This will allow us to run commands with elevated privileges. It’s like sudo for Linux. You can the follow the installation guide on their documentation. I’m going to install it using Chocolatey.
choco install gsudoAnd sudo command should be available now.
# Run PowerShell as Administrator
sudo pwsh
rm -rf
When I use Linux machine, I always use rm -rf command to delete files and alias rm to it. But in Windows, we need to use Remove-Item command. So I create an alias for it.
Remove-Alias -Name rm # Remove default rm command
function rm { Remove-Item -Recurse -Force $args } # Create new rm command
Autocompletion
Put the following lines in your profile file and you are done.
Set-PSReadlineKeyHandler -Key Tab -Function MenuComplete
Set-PSReadlineKeyHandler -Key UpArrow -Function HistorySearchBackward
Set-PSReadlineKeyHandler -Key DownArrow -Function HistorySearchForward
Alias
You can add some aliases to your profile file. For example:
# Alias `g` to `git`
Set-Alias g git;
Conclusion
That’s it. You can now use PowerShell as your daily driver. I hope this guide helps you to make your terminal look better.